Visions in Chapter 6
Visions in this chapter
No new Visions unlock in Chapter 6 (none in ffresonance.wiki's chapter page or Vorxu). Each boss step below says which Visions add an element or skill your party doesn't already have.
Updated Nov 14, 2026
Chapter 6 rebuilt as a numbered route in play order, from the airship to the flight to Pharm, with every chest, shard, side quest and boss placed at its step. The Lasswell HP conflict is resolved: the wiki bestiary lists both duels (5,000 HP, then 30,000 HP). The old claim that Vorxu's Pharm Aether is Enemy Lv 18 was wrong: Vorxu now lists Lv 46.
Side quests before Gronoa: Fina, Sakura, Dark Fina, Colosseum, Aileen
Where you are: on the airship, objective “Search the continent of Gronoa”
Shimmering Reflections and Mysidia, Ever Blooming unlock at Chapter 5's last objective (“Go to Gronoa”), and Last Respite is open by the start of this chapterwiki. Vorxu does them before landing on Gronoa because they pay permanent stat boosts. All optional, none missablePowerPyxkingy. The Tablet Shard on the Last Respite route is Chapter 4's west-road shard toward the Colosseum (PixelForge #58), already counted there, so Chapter 6 has 12 shards, all on Gronoa.
Enemies here: Side-quest stops
Every stop is an earlier area; its enemy table is in the chapter that first walks it: Earth Shrine and Siren's Tower (Chapter 1), Mt. Thunderclap and the Dwarven Forge (Chapter 2), Olderion and Lake Dorr (Chapter 3), Sunioo, the Arcane Library and the Tower of Mysidia (Chapter 5). No source names fights on the desert island stop. Tap a name for its attacks, resistances and full loot.
- Chapter startthe airship heads for Gronoa
Chapter 6 starts on the airship with the objective Search the continent of Gronoa, and you're free to fly anywhere first. The first half of Mechabo Unleashed (Verun on the airship, then 3 Mahadevas on Mysidia's western island) is back in Chapter 5, Mysidia overworld, steps 11–12. Its Malbodoom half is here in western Gronoa (Western Gronoa, step 4).
- Chapter 5 quests still openVictoria, Gilgamesh, Amelia
Vorxu lists Token Legacy, Errand's End and Battle at the Big Bridge among Chapter 6's first side questsVorxu. They actually open in Chapter 5, so I cover them there (Quests that open after Sunioo, steps 6–10). If Token Legacy still hasn't kicked off, rest at any inn, for example the Gaberada inn (Gaberada, step 8).
- Shimmering ReflectionsFina's quest, from Mysidia
Fina starts this one in Mysidia (Game Rant says at the town entrance)GameRant. Go to the Earth Crystal Chamber in the Earth Shrine, talk to Siren at the top of Siren's Tower, then go to Olderion, then Lake Dorr.
Reward: a Blessed Pendantwiki and Fina gets HP +100, MP +30, Spirit +30 and Magic +20VorxuRPG Site.
- Mysidia, Ever BloomingSakura's quest
A boy in Mysidia starts it (that's RPG Site; Game Rant says the kids south of Sakura's house)RPG SiteGameRant. Stop 1 is the forbidden text wing of the Arcane Library. Stop 2 is the top of the Tower of Mysidia. Pick Teleport at the save point by the tower entrance to jump straight to the top save point, since the elevator stays up once you've ridden itwiki. Stop 3 is the desert island northwest of Grandshelt.
Sources disagree · the islandkingy's game data says northwest of Grandsheltkingy. RPG Site says northwest of the Cavern of SwordsRPG Site.Stop 4 is the grave in Mysidia (RPG Site says east of the potion factory). Reward: the Amulet of Magic Absorption, and Sakura gets HP +100, MP +30, Magic +30 and Spirit +20RPG Sitekingy.
- Last RespiteGrandshelt tour (and Chapter 4's shard if you missed it)
Archwitch Fina starts it in Grandshelt, the Royal Capital. From the square, go right to the shops and talk to the man at the end. Then go left from the square to the far left of that area.
The Tablet Shard next to the boxes there is actually Chapter 4's west-road shard toward the Colosseum. Vorxu shows it here, but PixelForge #58 counts it in Chapter 4VorxuPixelForge, so it's only there if you didn't grab it back then.
Carry on with the objective outside the Colosseum, then the castle garrison, then the king, then Archwitch Fina on the airship deck. Reward: a Moonlight Ringwiki and Dark Fina gets HP +100, MP +30, Magic +30 and Strength +20Vorxu.
- Colosseumclear the Fledgling League
It's in Grandshelt, and Vorxu heads there right after the tourVorxu. There are four leagues of five set battles each. The first clear of each battle pays a one-off reward, and repeats pay less.
Fledgling (Lv 25–32): Magicite Shard x2, Adamantite, the Ancient Greatsword and the Gaia Hammer (Titan's sealing stone, from Fledgling 5). Brawler (Lv 40–48): Magicite x2, Adamantite x2 and the Ancient Cuirass. Give it a go if you're close to Lv 50Vorxu. Leave Gladiator (Lv 55–70) and Champion (Lv 75–99) for way later.
There's a known bug where a battle gets marked cleared without paying out, so check Gaps and conflicts → Patches and known issues before you start. The battle-by-battle strategy is in Postgame → Colosseum.
- Aileen's forgeone Adamantite per weapon
After Forger of Wills, Aileen's on the airship deck. Talk to her and she watches the party fight, then forges one weapon for every Adamantite you bring herVorxu.
Rain: Save the Vermillion (damage taken −20%). Lasswell: Shisui (Hone Senses and Placidity at battle start). Fina: Elysium (healing magic +20%). Lid: Mechabo Hammer SUPER (Overclock at battle start, First Strike). Nichol: Codex Providentiae (Tactic: Fluid Warfare for 3 turns, First Strike). Jake: Caelum Renatum (luck +8 at battle start, 2% of max MP back per damaging attack). Sakura: Roselia (Concentrate for 3 turns, Sage's Eye for 4 turns). Archwitch Fina: Abyss (her debuffs and ailments last 2 turns longer).
Adamantite you can get this chapter: the Colosseum (1 from Fledgling, 2 from Brawler), the first merchant ship (Gaberada, step 10), the Rugged Mountain Path chest (Holy section, step 7) and a radar treasure off Olderion (Holy section, step 2).
Gaberada, the Undertown
Where you are: Gronoa. Gaberada: 3 chests, 1 shard, 1 save
Enemies here: Gaberada, the Undertown
The wiki gives Gaberada no danger level or enemy list. Fights on the way in and out use the Gronoa (world map) table below. Tap a name for its attacks, resistances and full loot.
Enemies here: Gronoa (world map)
World-map list: every enemy the wiki bestiary places on this region's overworld. The wiki doesn't split it by road or sub-zone, so you won't meet all of these in one place, and some only appear later in the story. Tap a name for its attacks, resistances and full loot.
 Ancient DragonEnemy Lv 40 · 44,900 HP · Weak: Fire, LightSteal: Phoenix Pinion; rare: Solar Pendant
 BandercoeurlEnemy Lv 40 · 13,800 HP · Weak: EarthSteal: nothing
 CactuarEnemy Lv 30 · 1,111 HP · Weak: Ice, WaterSteal: Mist Ether; rare: Magicite Shard
 Death StalkerEnemy Lv 39 · 3,100 HP · Weak: WaterSteal: Knife of Paralysis; rare: X-Ether
 Gigantuar BossEnemy Lv ? · 11,111 HP · Weak: Ice, WaterSteal: Mist Turbo Ether; rare: Magicite
 Kaiser WolfEnemy Lv 40 · 3,300 HP · Weak: EarthSteal: nothing
 Kimara BugEnemy Lv 39 · 13,500 HP · Weak: Fire, WindSteal: Knife of Paralysis; rare: Mist Turbo Ether
 Mad OgreEnemy Lv 40 · 13,900 HP · Weak: WindSteal: Mist X-Potion
 MalbodoomEnemy Lv 40 · 44,900 HP · Weak: FireSteal: Knife of Confuse; rare: Poison Charm
 Metal RoperEnemy Lv 39 · 13,100 HP · Weak: WindSteal: Earth Scroll I; rare: Adamantine Beads
 Odin’s Shadow BossEnemy Lv 45 · 175,000 HP · Weak: LightningSteal: nothing
 PunisherEnemy Lv 39 · 3,300 HP · Weak: EarthSteal: nothing
 PurobolosEnemy Lv 40 · 13,500 HP · Weak: EarthSteal: Flame Scroll I
 RevenantEnemy Lv 40 · 3,400 HP · Weak: Fire, LightSteal: nothing
 Roundworm BossEnemy Lv 39 · 44,600 HP · Weak: WaterSteal: Smoke Bomb; rare: Angel Ring
 RudraEnemy Lv 39 · 42,600 HP · Weak: WindSteal: nothing
 TyrantEnemy Lv 39 · 43,400 HP · Weak: Fire, DarkSteal: X-Potion; rare: Inquisitor’s Gavel
- Land on Gronoathe grass patch, then Gaberada
- Chest 1Phoenix Pinion
Go up the stairs and head west straight away. At the end, walk north to the chest.
- Chest 2Fuma Shuriken x3
Head back to the entrance and walk straight north between the two buildings. The chest is to the northeast.
- Chest 3 and the Magi-tennasecret passage
Walk west into the secret passage that runs under the stairs. At the end, open the Remedy chest and talk to the man. He gives you the Magi-tenna, the first Mysidia Radar part, which Lid fits later (Holy section, step 2).
- Tablet Shardright of the quest building
Walk to the main quest marker. The shard's on the right side of the building.
- Find information on the miasmathe village elder
Talk to the elder (objective 2), which opens Reunion. Your next objective is "Get the white jade stone", and it points you to the Research Center Ruins, east of town.
- ReunionFryevia's elf hunt (optional)
Fryevia is at the Gaberada innGameRant.
Sources disagree · what unlocks itRPG Site says you only need Elven Maven doneRPG Site. The wiki says Elven Maven and Lyrical Riddleswiki.Search Sunioo for evidence of elves (RPG Site says there's a hidden path north of the village), then check the tree on Mt. Thunderclap for more, then get the rest from Silvia at the Dwarven Forge. Reward: a Magicite and 2,500 gil.
- Gaberada innToken Legacy may trigger here
- Gaberada shop
Weapons: Blood Sword, Rasetsu, Fujin's Bow, Scorpion Tail, Tome of Grace, Kokytos and Vajra StaffVorxu. Skip anything Aileen's going to forge for you.
Armour: the Jacket of Restoration (+56 Sanctity) for Fina. The Gear Plate (177/100 defence, +280 HP, −41 Speed) only on a heavy-armour tank. The White Robe (+37 Sanctity) for a robe caster. The items include Wind Scroll II and Earth Scroll II.
- First merchant shipAdamantite for 35,000 gil
From objective 2 on, the first merchant ship (out at sea, you reach it by airship) sells one Adamantite for 35,000 gil, once. It'll wait if you're shortwiki.
Gap · where the ship isNone of my sources gives its position.
Research Center Ruins: key cards and the white jade
Research Center Ruins: danger 40, 6 chests, 3 shards, 1 save. One visit only.
Vorxu: you only come here once, so collect everything before you take the white jade stone. Bring an X-Ether for the Violet Pot here (and another for Sanctissimus Shrine). Three Lab Key Cards and three consoles open the way.
Enemies here: Research Center Ruins (danger 40)
Tap a name for its attacks, resistances and full loot.
- Death StalkerEnemy Lv 39 · 3,100 HP · Weak: WaterSteal: Knife of Paralysis; rare: X-Ether
 Cursed SlateEnemy Lv 40 · 13,900 HP · Weak: LightningSteal: nothing
 GrenadeEnemy Lv 40 · 13,500 HP · Weak: WindSteal: Flame Scroll I
- Mad OgreEnemy Lv 40 · 13,900 HP · Weak: WindSteal: Mist X-Potion
 MedeiaEnemy Lv 40 · 44,500 HP · Weak: WindSteal: Mist X-Potion; rare: Rush Whip
 OberonEnemy Lv 40 · 44,600 HP · Weak: LightningSteal: Adamantine Beads; rare: Barrier Staff
 Violet PotEnemy Lv 42 · 99,999 HP · Weak: noneSteal: nothing
- Road pickupsMist Hi-Potion x3 and Deafening Bow
Heading east from Gaberada, there's Mist Hi-Potion x3 on a little hill, then the Deafening Bow shortly after.
- Level 1 Lab Key Cardat the entrance
Pick up the shiny thing on the floor. The save point's in the central hall, and a locked door tells you which card it wantswiki.
- Shard 1behind a desk
Go into the room on the left, then the room in its top-left corner. The shard is straight south of the doorway, behind a desk. Step on the green teleporter in the room's southwest corner.
- Console 1 and Lightning Scroll II
The central teleporter here needs power from three consoles. Use the console below the first container, then go to the bottom left and climb the ladder for Lightning Scroll II.
- Console 2 and Arcane Long Rifle
Walk east of the dead teleporter, then go down, left and up to console 2. Follow the shelves on the right and duck into the second row up from the bottom. That's the Arcane Long Rifle (Jake's gun, +10% magic damage).
- Mist Turbo Ether x2, shard 2 and console 3
Climb the ladder in the top-right corner for Mist Turbo Ether x2 on the left. Head south, and at the very bottom, left of the ladder, is shard 2. Climb down and use console 3.
- Level 2 Lab Key Card
Ride the now-powered teleporter to the room with the Level 2 card. Leave through the door and turn right into the main area.
- Unicorn Horn x3 and Fortress Gear
Go into the right-hand room and step on its teleporter. Unicorn Horn x3 is top-right in the next room. Use the teleporter there, then the right, left and right teleporters, for the Fortress Gear (+45 MP). Then head back.
- Violet Pot, shard 3 and Magicite
Use the left teleporter and go all the way up the ladder. On the left is a Violet Pot (Lv 42). Damage does nothing to it, so hand it an X-Ether and it knocks itself out, or just run. The last shard is down a path heading south on the right-hand side. Then walk down the path left of the ladder, turn right and go up for the last chest, a Magicite.
- Level 3 Lab Key Card, then the white jadeLAST CHANCE for this dungeon
Go south off the main path into the next area for the Level 3 card. Teleport back to the middle area, go north, take the elevator down and go through the doors. Make sure you've got all 6 chests and 3 shards, then pick up the white jade stone.
- Dark Fina's stat choice
After the jade, Archwitch Fina asks Rain something, and his answer sets her permanent bonusVorxu. "Yeah, you look sad." gives MP +10. "Of course I'm worrying about you. Why wouldn't I?" gives Magic +3. "I-I mean…sort of." gives Spirit +3.
Holy, the miasma bog, Rugged Mountain Path, Lux and Duggle
Rugged Mountain Path: danger 41, 3 chests, 2 shards, 2 saves. Duggle: 2 chests, 1 shard
Lux waits above the second save point and can't be fled. After it, rain drives the party into the Town of DuggleVorxu.
Enemies here: Rugged Mountain Path (danger 41)
Tap a name for its attacks, resistances and full loot.
 Lux BossEnemy Lv 41 · 125,000 HP · Weak: DarkSteal: nothing
- Kimara BugEnemy Lv 39 · 13,500 HP · Weak: Fire, WindSteal: Knife of Paralysis; rare: Mist Turbo Ether
- TyrantEnemy Lv 39 · 43,400 HP · Weak: Fire, DarkSteal: X-Potion; rare: Inquisitor’s Gavel
 AdeniumEnemy Lv 40 · 1,900 HP · Weak: FireSteal: nothing
- Show the village elder the white jade stone
- Fit the Magi-tennaLid, then radar treasures
Get on the airship and talk to Lid. The Mysidia Radar finds buried treasure now. Fly toward a signal, then ping right on top of the spot while you're in the airVorxu.
Five show up at this pointwiki. Ancient Garment off Gronoa (head northeast from Necromonarch Cave; Vorxu says left of where the airship lands on Gronoa). Adamantite off Olderion (head west from the Cave of Waters; Vorxu says a bit north of Olderion). Magicite in Zoldaad (south of the Sanctum of Shantotto). Spell Jacket in Mysidia (east of the Nameless Ruins). Berserker Ring in Pharm, south of Gronoa (southwest of the Abandoned Cabin).
- Go pick up Finashe learns Holy
Objective 5. Talk to Fina in Gaberada. The town exit stays shut until you do. She learns Holy, the spell that clears the miasma bogwiki.
- Use Holy on the miasma bogBrigand's Gloves, Knife of Sleep x2
Objective 6. With Fina in the party, use Holy on the bog you could only look at before (the wiki says it's to the east)wiki. Head west to the objective, and once the bog's clear, go north for the Brigand's Gloves. Knife of Sleep x2 is just outside the cave entrance. Then go into the Rugged Mountain Path.
- Shard 1dead end by the first save
From the first save point, walk west until it dead-ends.
- Kumobashiriside path
Keep on the main path. A little path on the right ends at a chest with the Kumobashiri (a katana for Lasswell: Haste for 3 turns at the start of battle).
- Adamantite and shard 2
Further along, there's a chest sitting out in the open with Adamantite for Aileen. In the same open area, shard 2 is in the top-right corner.
- Flame Scroll II, then the second save
The last chest is hidden above the second save point: Flame Scroll II. Heal and save, because Lux is next.
 Boss · Lux
Weak to Dark, halves Light. It acts twice a turn and has an 850 stagger gaugewiki. Your native Dark is Sakura's Stygian Scythe and Dark Fina's Shadow Unending (from Lv 41), and Sakura's Magicide strips its buffs.
Lux casts Reflect on itself, which bounces spells back, so switch to physical hits while it's up. Physical Dark goes through Reflect. Dark Fina's Queenly Whip has it natively, and Cecil's Dark Blade gives it to Rain, Lasswell or Jake. Victoria's Dark is magic, so Reflect bounces it.
It also stacks Protect, Shell, Bravery, Faith and Haste. Negation wipes your buffs, so recast after it. Its big Light hits are Luminant Purifier (whole party) and Dawn of Judgment (one target), so heal in between. Flash blinds everybody, and Fina's Esuna cleans that up.
Reward: 17,000 EXP, 13,500 gil and a Halo Ring.
🎒 Nothing to steal · Drop: Halo Ring- Town of DuggleIron Splitter opens, second merchant ship
After Lux you land in Duggle. Iron Splitter opens herewiki, and RPG Site says its area opens once Fina has HolyRPG Site. CGInferno fought its Lv 45 boss now, before Gronoa ShrineCGInferno. Vorxu leaves it until after GelidusVorxu, and that's where I put it too (After Gelidus, steps 3–6).
The second merchant ship stocks the Ancient Cloak now: 40,000 gil, one copywiki.
Gap · where the ship isNone of my sources gives its position. - Duggle chest 1Fuma Shuriken x2
From the inn, walk toward the left bridge and turn right before you cross it.
- Duggle chest 2 and shardX-Potion x2
Follow the path left of the shops to the X-Potion x2 chest. The Tablet Shard is to the right of the shops.
- Duggle shop
Lid: Star Shatterer. Nichol: Book of the Stars. Jake: Quicksilver. Sakura: Unyielding Staff. Skip anything Aileen's already forged. Armour: Gladiator's Armor (+200 HP, −44 Speed) for heavy armour, the Xibalba Coat for light armour and the Feather Robes (+61 Sanctity) for robes.
Western Gronoa, Gronoa Shrine and Elfdrit
Gronoa Shrine: danger 42, 4 chests, 3 shards, 2 saves
With the miasma gone, western Gronoa opens: finish Mechabo Unleashed on the way. Reaching the shrine registers it for fast travel. The wiki also lists Dark Fang (Lv 38–40) as an optional fight here, but no source says where it is.
Enemies here: Gronoa Shrine (danger 42)
Tap a name for its attacks, resistances and full loot.
 Dark Fang BossEnemy Lv 38 · 13,400 HP · Weak: Water, LightSteal: nothing
 Elfdrit BossEnemy Lv 42 · 120,000 HP · Weak: Fire, LightSteal: nothing
- Cursed SlateEnemy Lv 40 · 13,900 HP · Weak: LightningSteal: nothing
- RevenantEnemy Lv 40 · 3,400 HP · Weak: Fire, LightSteal: nothing
 AbaddonEnemy Lv 41 · 46,500 HP · Weak: Earth, LightSteal: Knife of Confuse; rare: Rock Cloak
 RosettaEnemy Lv 41 · 14,200 HP · Weak: LightningSteal: Mist Potion; rare: Iron Baton
 TonberryEnemy Lv 42 · 39,393 HP · Weak: LightningSteal: Shuriken; rare: Fuma Shuriken
- Earth Scroll II x2leaving Duggle
Leave Duggle by the path going up. Earth Scroll II x2 is on the northeast edge.
- Register Necromonarch Cave, then Shadowstep Garb
Follow the path south to an opening with a bridge going east. Cross it and go into Necromonarch Cave to register it, but don't fight yet (it's Lv 55; After Gelidus, step 7). Come back out and go south into a small opening for the Shadowstep Garb.
- Mist X-Potion and Mist X-Ether
Cross back over the bridge and go south down to the lower level. When you see Necromonarch Cave above you, turn right for a Mist X-Potion, then keep going north for a Mist X-Ether.
 Boss · Malbodoom x3
Weak to Fire. They're random fights on the Gronoa world map (the table's in the Gaberada section). Rain's your native Fire (Flame Sword, Firaga), and Clive or Vaan give Lid, Lasswell or Jake physical Fire.
Their big attack, Bad Breath, can Poison, Blind, Silence and Confuse the whole party. Calm Armlets block the Confuse and Fina's Esuna cures the rest. They're hard to stagger. Each one: 4,800 EXP and 9,500 gilwiki.
Beat three for Mechabo Unleashed, but don't head back to the airship yet.
🎒 Steal: Knife of Confuse; rare: Poison Charm · Drop: nothing- Healing Spring x3 and Anatomy of Magic
Head toward Gronoa Shrine. In the top-left corner before the bridge there's Healing Spring x3. Keep going south, then take the left fork southwest for Anatomy of Magic.
- Register Gronoa Shrine, then hand in Mechabo
Reaching the shrine adds it as a fast travel point. Fast travel to the airship and give Verun the parts. That finishes Mechabo Unleashed, and the reward is a Magicite Cryst. Cash in your Tablet Shards at Oblivion Palace if you want, then fast travel backVorxu.
- Shrine Mist X-Ether and shard 1
In the next area, go right. The chest at the bottom has a Mist X-Ether. Climb back up the stairs, and shard 1 is in the bottom right.
- Shrine Magicite Cryst and shard 2
Follow the path to a dead end. Go left to the end first for a Magicite Cryst, then all the way right and up the stairs for shard 2.
- Shrine shard 3 and Rod of Focus
From under the stairs, head north and go down the ladder on your right. Walk to the far west and climb the ladder. Shard 3 is to the south and the Rod of Focus chest is to the east (a rod for Sakura: +30% stagger power on an elemental weakness).
- Hermes Sandals, then the Elfdrit save
Go back to the first ladder you came down and head south. Where the path ends, turn right for the Hermes Sandals (Haste that's always on). Take the path right of the one you came in on and ride the elevator down. Heal and save.
 Boss · Elfdrit
Weak to Fire and Light, halves Dark. It acts twice a turn and has a 1,400 stagger gaugewiki. Your native Fire and Light come from Rain (Flame Sword), Fina (Luminant Cannon) and Sakura (Luminant Glim).
Clive or Vaan add physical Fire, and Cecil's Banish Blade adds physical Light, to Lid, Lasswell or Jake. Terra gives Nichol or Dark Fina Fire magic. Bench your Dark, since it only does half.
A Headband blocks Sleep Gas and a Jeweled Ring blocks Paralysis Slash. Fina's Light Veil covers Poison, Sleep, Paralysis and Silencewiki.
Sources disagree · RecuperateThe wiki says Recuperate, its devastating move, refills its stagger gaugewiki. Vorxu says it heals itself below 60% HPVorxu. Either way, keep hitting the weakness and break it first.Below 60% it adds Venom Breath, Graviga and DarkgaVorxu. Reward: 17,000 EXP and 13,500 gil.
🎒 Nothing to steal · Drop: nothing
Sanctissimus Shrine: six trials, Lasswell and Gelidus
Sanctissimus Shrine: danger 43, 2 chests, 2 shards, 5 saves. Nine no-escape fights, and a point of no return before the last three.
Each trial starts when you read its stele, and the stele's riddle is the hint for that fight. Saves sit just before fights 1 and 3wiki; some fights have none nearby, so heal before and after each. Five of the six trial bosses act twice a turn.
Enemies here: Sanctissimus Shrine (danger 43)
Tap a name for its attacks, resistances and full loot.
 Arch Gargoyle BossEnemy Lv 40 · 55,000 HP · Weak: Wind, LightSteal: nothing
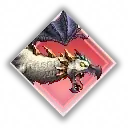 Archaeoaevis BossEnemy Lv 40 · 130,000 HP · Weak: Wind (varies by form)Steal: nothing
 Dad Bomb BossEnemy Lv 40 · 140,000 HP · Weak: FireSteal: nothing
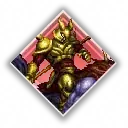 Test Rider BossEnemy Lv 40 · 150,000 HP · Weak: Earth, LightSteal: nothing
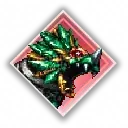 Yakhanati BossEnemy Lv 40 · 145,000 HP · Weak: Wind, DarkSteal: nothing
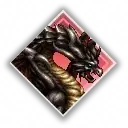 Dragon BossEnemy Lv 42 · 175,000 HP · Weak: LightningSteal: nothing
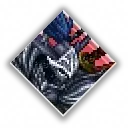 Gelidus BossEnemy Lv 43 · 200,000 HP · Weak: FireSteal: nothing
- Lasswell BossEnemy Lv 43 · 30,000 / 5,000 HP · Weak: noneSteal: nothing
- GrenadeEnemy Lv 40 · 13,500 HP · Weak: WindSteal: Flame Scroll I
- RosettaEnemy Lv 41 · 14,200 HP · Weak: LightningSteal: Mist Potion; rare: Iron Baton
- Violet PotEnemy Lv 42 · 99,999 HP · Weak: noneSteal: nothing
- Go to Sanctissimus Shrinesouth
- Boss · Trial 1 Archaeoaevis
Weak to Wind at first. The stele says: "An ever-shifting foe blocks your path; strike its weakness, and unleash your wrath."
Its devastating move, Barrier Shift, gives it a new random weakness (Water, Fire, Ice, Wind, Earth or Lightning) and halves the other five. Light and Dark stay neutral, and a stagger cancels the shift. Cast Libra after every shift. Nichol learns it himself, and Leah gives it to Fina.
Spread your elements across the four of you. The native ones are Jake (Wind), Rain (Fire), Lasswell (Ice), Nichol (Water), Lid (Earth) and Sakura (Lightning). Fina's Light or Dark Fina's Dark is the safe fallback while you check. Rabid Claw can Confuse and Berserk, so wear Calm Armlets.
Gauge 1,300. 14,500 EXP and 12,000 gil.
🎒 Nothing to steal · Drop: nothing - Boss · Trial 2 Dad Bomb
Weak to Fire, halves Ice. The stele says: "There are many ways that one may know, to evade a foe's most deadly blow."
Every hit builds its anger. Fire counts double, and nothing counts while it's staggered. You'll see "internalizing his anger…", then "further internalizing anger", then "Dad Bomb has had enough!", then it uses Explode on the whole party, which also ends the fight.
Explode is way stronger while its HP is high (about five times as strong at 75%+ as at 25% or less), so the danger is its anger filling up before you've brought its HP down. Keep Shellga up from the start, and use Fina's Arcane Guard (halves magic damage on everyone, once) at "has had enough!". A stagger only holds Explode off for a while.
Rain brings Fire on his own, and the wiki swaps him in for Jake herewiki. Gauge 1,300. 15,500 EXP and 11,000 gil.
🎒 Nothing to steal · Drop: nothing - Boss · Trial 3 Test Rider
Weak to Earth and Light. The stele says: "Serene in one turn, but in another its fury does burn. Its mercurial emotion you shall discern."
It flips between Rage (+30% attack, −30% defence) and Repose (the other way round) every four of its actions, and the state name shows on screen. Spend your Limit Bursts while it's raging, with Protect and Shell up, and build the gauge while it's calm. Golden Lance, its devastating single-target hit, is the 3rd action of every Rage stretch. While it's calm it casts Curaga on itself, plus Deprotect, Debrave, Silence and Gravity.
Native Earth and Light come from Lid (Stonega, Mechabo Kick), Fina (Luminant Cannon) and Sakura (Luminant Glim). Wilhelm, Camille, Aileen or Bartz give Rain or Jake physical Earth, and Cecil gives them physical Light.
Gauge 720. 20,000 EXP and 20,000 gil.
🎒 Nothing to steal · Drop: nothing - Shard 1 and Whip of AfflictionViolet Pot room
After Test Rider, take the path above the stairs into another room. Go up the stairs to a Violet Pot, use an X-Ether on it, then climb the ladder for shard 1. Keep heading down a few levels to the Whip of Affliction (for Dark Fina: her debuffs and ailments last 1 turn longer). Then go back to the room before for Yakhanati.
- Boss · Trial 4 Yakhanati
Weak to Wind and Dark. The stele says: "The mighty wield blades, the clever command magic. The wise must choose well."
Assaulting Warcry shuts out physical attacks and Magic Warcry shuts out magic. It picks whichever one blocks what hit it lastwiki. So bring both kinds and switch after every warcry.
Physical: Jake's Gale Strike (Wind) and Dark Fina's Queenly Whip (Dark). Magic: Jake's Aero line, Sakura's Stygian Scythe and Blighted Gloom, and Dark Fina's Shadow Unending. For physical Wind, give Clive (Aero Surge) to Rain or Lid, or use the Sylph's Tiara from Aether to make plain physical hits Wind.
Wear a Jeweled Ring for Paralysis Fang (devastating) and a Headband for Sleep Slash. Gauge 720. 18,000 EXP and 18,500 gil.
🎒 Nothing to steal · Drop: nothing - Boss · Trial 5 Arch Gargoyles
Weak to Wind and Light. The stele says: "If even one endures the strife, know that they shall have eternal life."
Whichever one's left standing brings the other back with Revive (devastating; a stagger cancels it), so get both of them low and finish them on the same turn. Hits on every enemy work best: Fina's Luminant Cannon and Sakura's Luminant Glim (Light), Lid's Enterprise Airstrike Limit Burst, and Jake's Demolisher Rush (Wind) once his luck level hits 8. Breath Wing hits everyone three times with Wind.
One action a turn, 600 gauge each. 8,500 EXP and 6,500 gil each.
🎒 Nothing to steal · Drop: nothing - Boss · Trial 6 Dragon
Weak to Lightning. The stele says: "Impending is a breath most immense: use your time wisely, and prepare your defense."
A countdown (4 to 1, per Vorxu)Vorxu ends in either Flame Breath (Fire magic on everyone) or Windstorm (99% of everyone's current HP). Stagger it before zero to cancel. If Windstorm lands, heal on the very next action.
Native Lightning is Sakura (Tonitus on every enemy; cast Sage's Eye first for +50% stagger with weakness magic) and Jake (Blitzstrahl). Cloud's Thunder Surge, Bartz or Lightning give Rain or Lid physical Lightning. Keep Shell up for Blaze and Blizzaga.
Gauge 1,400. 20,000 EXP, 20,000 gil and a Magicite Cryst.
🎒 Nothing to steal · Drop: Magicite Cryst - Shard 2 and Hero's Bladethe elevators
After the ladder, ride the elevators up. Shard 2 is on the way. On the second-to-last floor, far left, is the hidden Hero's Blade (a greatsword for Rain: Bravery for 3 turns at the start of every battle). Heal and save at the top.
- The gardenPOINT OF NO RETURN
At the end of the corridor there's a garden where everyone has a talk. Once you move on, there's no going back, and three no-escape fights come back to back: Lasswell twice, then Geliduswiki.
Before you go on, give Rain the Warrior of Light or Leah. Their Cure is the healing he needs in the duels, because nobody else can heal him there. Put the Hero's Blade on him too.
- Boss · Lasswell duel 1
No weakness, and his 9,999 stagger gauge won't break. Rain fights solo. Lasswell's holding back here: plain attacks and Blizzara onlyVorxu. Don't waste items. No EXP or gil.
🎒 Nothing to steal · Drop: nothing - Boss · Lasswell duel 2
No weakness and an unbreakable 9,999 gauge, so it's just a damage race. Rain's solo again, and now Lasswell acts twice a turnwiki. He opens with Hastega and Blizzaga. Absolving Hailstorm is his big Ice attack, so keep Rain's HP high before it hits.
Heal with the Vision's Cure. Crimson Onslaught, Rain's Lv 25 Limit Burst, is his hardest single-target hit. No EXP or gil.
🎒 Nothing to steal · Drop: nothing - Boss · Gelidus
Weak to Fire, halves Ice. It acts twice a turn against your full party and has a 1,500 stagger gauge. Rain's your native Fire (Flame Sword). Clive or Vaan give Lid or Jake physical Fire, and Terra gives Nichol, Sakura or Dark Fina Fire magic.
Wear a Tiara of Frost for Blizzaga and Absolute Zero, and cast Protect for Clobber and Swing Weapon. It changes behaviour once everyone in the party has lowered physical defence (that's from the bestiary), so get Fina's Light Veil up before Deprotega lands on everyone.
Below 60% HP it adds Stormbound Smite and Glint of Verglas (both devastating), Slowga, Deprotega and Mighty AuraVorxu. Strip the aura with Nichol's Dispel or Sakura's Magicide.
Reward: 22,000 EXP, 13,500 gil and the Snow Spirit's Scarf. Sakura then teleports everyone back to the airship.
🎒 Nothing to steal · Drop: Snow Spirit’s Scarf - Search for clues to the Dark Crystalthe airship deck
Objective 13, the last one of the chapter, starts on the deck.
Sources disagree · where Chapter 6 endsThe wiki, and CGInferno's "Chapter 6 Tranquility COMPLETE" card, end the chapter herewikikingy. Vorxu ends it with the Aether fight over PharmVorxu. Either way you can still fly around freely.The next section covers Odin and the cleanup, then the flight to Pharm.
After Gelidus: Odin, cave masters and the flight to Pharm
Where you are: free roam on Gronoa before Pharm
All optional. Iron Splitter (Odin) has been open since Duggle. The three Gronoa cave masters are Lv 54–55: register their caves now and fight them later.
Enemies here: Bladerain Stele
No published encounter list (the wiki map page shows no enemies). Tap a name for its attacks, resistances and full loot.
Enemies here: Humbaba Cave (danger 55)
Tap a name for its attacks, resistances and full loot.
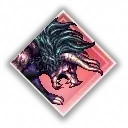 Humbaba BossEnemy Lv 55 · 450,000 HP · Weak: WindSteal: nothing
Enemies here: Necromonarch Cave (danger 55)
Tap a name for its attacks, resistances and full loot.
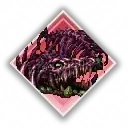 Necromonarch BossEnemy Lv 55 · 444,444 HP · Weak: Fire, LightSteal: nothing
Enemies here: Catacumba Cave (danger 54)
Tap a name for its attacks, resistances and full loot.
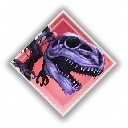 Catacumba BossEnemy Lv 54 · 380,000 HP · Weak: Fire, LightSteal: nothing
- Remedysouth of the Research Center Ruins
Head for the Research Center Ruins. Just south of the entrance there's a shiny Remedy on the cliffs.
- X-Potion, Wind Scroll II x2 and register Humbaba Cave
Go to the very top and far left for an X-Potion, then far right for Wind Scroll II x2. Go into Humbaba Cave to register it, but don't fight yet (Lv 55).
- Iron Splitterthe Bladerain Stele
Then go to the Bladerain Stele (RPG Site says northeast of Duggle)RPG Site and interact with it to take the quest. In CGInferno's runkingy there's no fight here. You get the Broken Sword Hilt, and your objective switches to finding the rest of the sword on Gronoa's western precipice.
Sources disagree · the steleRPG Site has you pick "Prove yourself" and fight right at the steleRPG Site. - Western precipice“Prove yourself”
Up on a cliff in the miasma fields, a voice tells you the sword you've got is its missing half. Pick Prove yourself (Back away turns it down), and the phantom rider attacks. That's from CGInferno via kingy, in game-data orderkingy.
- Boss · Odin's Shadow
Weak to Lightning. It acts twice a turn and has a 1,500 stagger gauge. Native Lightning is Sakura (Thundaga, Tonitus) and Jake (Blitzstrahl), and Cloud, Bartz or Lightning give Rain, Lasswell or Lid physical Lightning. Per the bestiary, it counterattacks after a set number of physical Lightning hits, and after a set amount of magic damage while it's Slowed.
"Odin started concentrating…" kicks off a death knell that ends in Zantetsuken (whole party, 25% instant death). Safety Bits from Mysidia's shop block it. Its counters hit hard but push the knell back. "Odin readies his stance!" means a stronger pattern is coming, and Sundering Wind lowers your defences. Wear a Headband for Sleep Slash and a Jeweled Ring for Paralysis Slash.
Reward: 22,000 EXP, 16,500 gil and a Magicite Cryst.
🎒 Nothing to steal · Drop: Magicite Cryst - Return the swordOdin joins
Bring the sword back to the Old Man at the Nameless Ruins. It's his. Odin now answers Fina's summons. He costs 50 MP, stays 3 turns, and uses Flurry, Gungnir, Stab and Zantetsuken.
- Cave mastersCatacumba, Necromonarch, Humbaba
Catacumba (Enemy Lv 54, 380,000 HP, weak to Fire and Light; 14,500 EXP, 15,600 gil, drops an Elixir). Necromonarch (Enemy Lv 55, 444,444 HP, weak to Fire and Light, resists Earth; 16,500 EXP, 20,000 gil, drops an Elixir). Humbaba (Enemy Lv 55, 450,000 HP, weak to Wind). You can run from all of them, and each one pays a Magicite Crystwiki.
Gap · Catacumba CaveNone of my sources says where Catacumba Cave is on Gronoa.Order and strategy are in Postgame → Free roam, missing collectibles and gear roadmap → Cave Masters.
- Cash in Tablet ShardsOblivion Palace
Fast travel there and talk to the princess. If you've found every shard so far, you'll have 87, which is enough for every box through the 3-Star Chamber. The first 4-Star box needs 89Vorxu.
- Chapter exitfly south to Pharm