Visions in Chapter 7 (Charlotte, Ayaka)
Visions in this chapter
The last two Visions in the game, both from side quests that open in this chapterwiki. With them you hold all 26 Visions before Chapter 8's point of no return.
- CharlotteThe Shield of the Weak
When: her quest unlocks at Chapter 6's last objective, "Search for clues to the Dark Crystal", so it's open as soon as Chapter 7 startswiki.
Getting there: Aether, then Lasswell's and Charlotte's quests, steps 5 to 9.
What you get: Charlotte (Sentinel, physical) with Blizzard Surge (Ice), Water Surge (Water) and Shell. Physical damage taken −20%, plus Knight of the Sacred Frost (after an Ice attack, plain physical attacks carry Ice for 3 turns). You also get a Magicite Cryst.
What she adds: physical Water, which nobody in the party has natively, and physical Ice for anyone who isn't LasswellwikiVorxu.
- AyakaThe Admirable Apprentice
When: she opens up with "Go to Mt. Reizan", after you talk to Ayaka in Sianwiki.
Getting there: Pharm, the Abandoned Cabin, Sian and Ayaka's quest, steps 8 and 10 to 12.
What you get: Ayaka (Medic) with Cure, Esuna, Dispel, Libra and Protect. Healing magic +30%, plus the Resonance Angelic Embrace (heals all allies and clears debuffs and ailments). You also get a Magicite Cryst.
What she adds: the +30% healing and Angelic Embrace, so put her on Fina or another healer. Her spells just repeat what Fina (Esuna) and Nichol (Libra, Dispel) already have. She's a White Magic Vision, so give her to a caster. Lid's a physical bruiser and is better off with a physical onewiki.
Updated Nov 14, 2026
Chapter 7 rebuilt as a numbered route in play order, from Aether on the deck to the flight to the Crystal Tower, with every chest, shard, side quest and boss placed at its step. Corrected: Adamandelion is Enemy Lv 48 with 67,500 HP (was 19,800), the Cavern of Swords Magitek Weapon is Enemy Lv 45 (was Lv 41), and Umbra pays 50,000 EXP and 21,000 gil. Resolved: the final YES/NO comes after Behemoth and before Sol, and Chapter 8 now says the same. A New Leaf moved here from Chapter 8.
Aether, then Lasswell's and Charlotte's quests
Where you are: on the airship nearing Pharm, objective “Go to the town of Sian”
Aether attacks on the Deck before the first objectivewiki. The Twin Titleholders and The Shield of the Weak unlock at Chapter 6's last objective, so they're waiting when the chapter startswiki; Vorxu and CGInferno's playthroughkingy do both before Sian. Mt. Reizan stays shut until you've talked to Ayaka in Sian.
Enemies here: Side-quest stops
Gaberada (Chapter 6) and Grandshelt Castle (Chapter 1) are earlier areas; their tables are in those chapters. Aether is fought on the airship deck, with no random fights. The Adamandelion's row is in the Olderion (world map) table in Chapter 3; its boss card is step 3 below. Tap a name for its attacks, resistances and full loot.
Enemies here: Lost Cave
No published encounter list (the wiki map page shows no enemies). Tap a name for its attacks, resistances and full loot.
Enemies here: Kolobos Ruins (danger 7)
Tap a name for its attacks, resistances and full loot.
 The Hunger BossEnemy Lv 9 · 2,500 HP · Weak: IceSteal: nothing
 The Hunger v2 BossEnemy Lv 10 · 7,000 HP · Weak: LightSteal: nothing
 Wraith SoldierEnemy Lv 5 · 240 HP · Weak: Fire, LightSteal: nothing
 GhostEnemy Lv 7 · 300 HP · Weak: Ice, LightSteal: Smoke Bomb
 GhoulEnemy Lv 7 · 300 HP · Weak: Fire, LightSteal: nothing
 PopliumEnemy Lv 8 · 700 HP · Weak: Water, LightSteal: nothing
 Enhanced Wraith SoldierEnemy Lv 9 · 650 HP · Weak: Fire, LightSteal: nothing
 FloateyeEnemy Lv 9 · 2,430 HP · Weak: Ice, LightSteal: nothing
 Imposter SoldierEnemy Lv 10 · 1,600 HP · Weak: Ice, DarkSteal: nothing
 Former KnightEnemy Lv 40 · 16,500 HP · Weak: Fire, LightSteal: nothing
 Magitek WeaponEnemy Lv 41 · 18,700 HP · Weak: LightningSteal: nothing
Enemies here: Cavern of Swords
Tap a name for its attacks, resistances and full loot.
- Magitek WeaponEnemy Lv 45 · 60,000 HP · Weak: Lightning, WaterSteal: nothing
 Boss · Aether
Weak to Ice, and Wind does nothing. You fight it on the deck as the airship gets close to Pharm, and Aether goes first. Its first action calls its Minion (15,000 HP) and its Guardian (18,000 HP, heals Aether) together.
After that it cycles Skewer, Merciless Judgment or Shamshir, then Tempest or Aeroga, with Heavenly Wind (devastating) every third turn. Once it's been alone for two turns, it calls both of them backwiki.
Lasswell's Absolving Hailstorm (Ice on every enemy) is the skill for this fight, and Blizzaga handles single targets. Fina's Shellga covers Tempest and Aeroga in one gowiki. Aileen, Lightning or Tronn give Rain, Lid or Jake physical IceVorxu. Bench Jake's Wind.
Reward: 30,000 EXP, 14,000 gil and a Wind Scroll II.
🎒 Nothing to steal · Drop: Wind Scroll II- The Twin Titleholdersstart at the Gaberada inn
 Boss · Adamandelion
Weak to Ice. It's on the island near Olderion (RPG Site via kingy says north of the Water Shrine)kingy. It buffs its defences with Mighty Guard and CarapaceVorxu, so strip those with Nichol's Dispel or Sakura's Magicide. Graviga takes 50% of the whole party's current HPwiki, so top up after it.
Lasswell has Ice on his own, and Aileen, Lightning or Tronn give everyone else physical IceVorxu. It's open to Slow, Debrave, Defaith, Deprotect and Deshell.
Reward: 17,000 EXP, 9,500 gil and a Mist X-Potion.
Sources disagree · level and HPMeowDB also has a Lv 50 entry with 19,800 HPkingy. The wiki bestiary and Vorxu both say Enemy Lv 48 with 67,500 HPwikiVorxu.🎒 Nothing to steal · Drop: Mist X-Potion- Gaberada elder, then the Lost Cave → Crest of Criticality
Talk to the village elder in Gaberada, then head to the Lost Cave north of Grandshelt CastleVorxu. Reward: the Crest of Criticality, and Lasswell gets a permanent HP +100, MP +30, Strength +30 and Speed +20wikiVorxu.
- The Shield of the Weakfind Charlotte (CONFLICT on where)
- Grandshelt Castle3 people, and the far-left room's 3 chests
Ask around with three people at Grandshelt Castle (RPG Site via kingy says it's two people and a shelf)kingy. While you're in the castle, the room at the far left of the first floor has a Mist Turbo Ether, the Hoodwink Garb and Mist Hi-Potion x2Vorxu.
- Boss · Kolobos Ruins: 3 Former Knights + Magitek WeaponEnemy Lv 40–41 · Suggested ~Lv 40–41 · No escape · Weak: Fire/Light (knights) and Lightning (Magitek Weapon)
The knights are weak to Fire and Light and halve Dark. The Magitek Weapon is weak to Lightning. Three Former Knights (16,500 HP each) and a Magitek Weapon (18,700 HP) are waiting in the Kolobos Ruins.
The knights only Slash and Stab, so take them out firstVorxu. Rain's Fire, Fina's Luminant Cannon and Sakura's Luminant Glim cover them on their own. Clive, Squall or Vaan add physical Fire, and Cecil adds Light, to Lasswell, Lid or JakeVorxu.
Then the Magitek Weapon: Sakura's Thundaga or Tonitus and Jake's Blitzstrahl. Its Megavolt paralyses and Poison Gas poisons the party, so wear Star PendantsVorxu.
Reward: 2,400 EXP and 500 gil per enemywiki. Vorxu lists 4,800 EXP and 1,000 gil for the whole fightVorxu.
🎒 Former Knight (×3) — Nothing to steal · Drop: nothing - Boss · Mother's Magitek Weapon
Weak to Lightning and Water. Find "Mother" at the Cavern of Swords, northeast of Siren's TowerVorxu. It gets two actions a turn: Machine Gun, Missile (30% of max HP), Laser (Light) and Poison Gaswiki.
Sakura's Lightning, Jake's Blitzstrahl and Nichol's Water cover it on their own. Wilhelm, Camille, Cloud or Tidus give Rain, Lasswell or Lid physical Water, and Lightning, Bartz or Cloud give them physical LightningVorxu. Wear Star Pendants for Poison Gas.
Reward: 15,000 EXP and 3,500 gil.
🎒 Nothing to steal · Drop: nothing - Meet Charlotte in Grandshelt → Charlotte and a Magicite Cryst
Pharm, the Abandoned Cabin, Sian and Ayaka's quest
Where you are: on the airship over Pharm, objective “Go to the town of Sian”
Enemies here: Pharm (world map)
World-map list: every enemy the wiki bestiary places on this region's overworld. The wiki doesn't split it by road or sub-zone, so you won't meet all of these in one place, and some only appear later in the story. Tap a name for its attacks, resistances and full loot.
 AbyssalEnemy Lv 50 · 57,700 HP · Weak: Ice, LightSteal: Ice Scroll II
 AdarEnemy Lv 46 · 4,500 HP · Weak: WaterSteal: nothing
 Black FlanEnemy Lv 47 · 19,100 HP · Weak: LightSteal: nothing
 Black LizardEnemy Lv 35 · 13,500 HP · Weak: IceSteal: nothing
 BronzeEnemy Lv 47 · 18,700 HP · Weak: LightningSteal: nothing
 Chaos Dragon BossEnemy Lv 48 · 19,500 HP · Weak: IceSteal: nothing
 Dire LizardEnemy Lv 44 · 18,000 HP · Weak: IceSteal: nothing
 Evil BearEnemy Lv 45 · 18,000 HP · Weak: EarthSteal: Unicorn Horn; rare: X-Potion
 Evil DreamerEnemy Lv 45 · 4,500 HP · Weak: LightSteal: nothing
 Flan PrincessEnemy Lv 48 · 19,500 HP · Weak: DarkSteal: Smelling Salts; rare: Guardbreaker
 Gigantuar BossEnemy Lv ? · 11,111 HP · Weak: Ice, WaterSteal: Mist Turbo Ether; rare: Magicite
 Greater MantisEnemy Lv 47 · 19,500 HP · Weak: Fire, WindSteal: nothing
 HeimdallrEnemy Lv 49 · 4,800 HP · Weak: DarkSteal: nothing
 HydraEnemy Lv 48 · 19,500 HP · Weak: LightningSteal: Lightning Scroll I; rare: Cursed Whip
 King Gil SnapperEnemy Lv 49 · 60,000 HP · Weak: IceSteal: Small Golden Shell; rare: Large Golden Shell
 Metal GigantuarEnemy Lv 52 · 14 HP · Weak: noneSteal: nothing
 Ogre ChiefEnemy Lv 48 · 19,800 HP · Weak: WindSteal: Knife of Silence; rare: Index of War
 PiscodaemonEnemy Lv 46 · 18,700 HP · Weak: EarthSteal: Pole Mace
 Sahagin ChiefEnemy Lv 46 · 18,400 HP · Weak: LightningSteal: nothing
 ShantakEnemy Lv 49 · 56,700 HP · Weak: WindSteal: Mist X-Potion; rare: Plate of Providence
 ShutEnemy Lv 49 · 19,800 HP · Weak: Water, LightSteal: Hi-Potion; rare: Illusory Robe
 Sliding WormEnemy Lv 46 · 18,700 HP · Weak: Ice, WaterSteal: nothing
 Thunder GigasEnemy Lv 45 · 18,400 HP · Weak: EarthSteal: Lightning Scroll II; rare: Shock Whip
Enemies here: Ley-line stops and Sian
Waterfall Way (Chapter 3) and Mt. Thunderclap (Chapter 2) are earlier areas; their tables are in those chapters. No source lists fights in the Town of Sian. The Infernal Hollow table below holds the Ashasaur. Tap a name for its attacks, resistances and full loot.
Enemies here: Infernal Hollow
Tap a name for its attacks, resistances and full loot.
 AshasaurEnemy Lv 47 · 67,500 HP · Weak: Fire, LightSteal: nothing
- Pharm by airshipthe pickups (spots: gap)
Grab these with the airship: Mist Hi-Potion, Elixir x2, Fuma Shuriken, Healing Spring x3, Smoke Bomb x5, Magicite Shard, Knife of Paralysis x3, Mist X-Potion, Turbo Ether x2, Water Scroll II and Mist X-Ether x2Vorxu.
Gap · the exact spotsVorxu only marks each spot on screenshot minimaps, and no source describes them in words.There's one more, a Megalixir, on the small island outside Dragon's Maw. Vorxu says it "opens up later".
- Abandoned Cabincheck the locked door first
It's in the far north of Pharm. It's locked, and checking the door is what gets the man in Sian to hand over the keyVorxu.
- SianTablet Shard and Phoenix Pinion x3
Land at the Town of Sian. From the shops, go to the far right. The Tablet Shard is under the tree next to the bridge, and the chest across from it on the left has Phoenix Pinion x3Vorxu.
- Mist Turbo Ether, Fuma Shuriken x2 and the tea-leaves gift
- Mist Hi-Potion x2 and the Cabin Key
Follow the path round the right side of the inn to the last chest, Mist Hi-Potion x2. The man standing front-left of the inn gives you the Cabin Key, as long as you've checked the cabin doorVorxu.
- Sian shopwhat's worth buying
Weapons (Vorxu's prices): Kotetsu (Lasswell) 42,000. Fortune's Maul (Lid) 48,500. Book of the Cosmos (Nichol) 47,500. Silver-Round Rifle (Jake) 48,000. Silver Staff (Sakura) 43,000. Kagura Longbow (Fina, 119 Sanctity for healing) 45,000. There's also the Malice Breaker at 41,000 and Shinobi's Kusarigama at 45,000. Skip any weapon Aileen has already forged a better one for.
Armour: Elegant Robe (Speed +51) 36,000. Shinobi Gear (Speed +35) 40,000. Beast Hunter's Armor (HP +350, Speed −51) 44,000.
Accessories: one resist for each element at 3,000 gil each. The Fire Sprite Earrings (resist Fire) help against Igniswiki, and Silver Keys (resist Dark) are worth buying here for Umbra, since only one comes from a chest.
- Gather informationtalk to Ayaka
- The Admirable Apprenticetalk to Ayaka again before you leave
- Back to the Abandoned CabinAncient Rod
Use the Cabin Key and open the chest inside: it's the Ancient Rod, one of the Chamber of Arms piecesVorxu.
- Ley line 1Waterfall Way (Olderion)
- Boss · Ashasaur
Weak to Fire and Light, halves Earth. It's sitting on the ley line inside the Infernal Hollow, the volcano in ZoldaadVorxu. kingy, quoting RPG Site, says you get in by flying the airship over the fire vortex by the volcanokingy. It gets two actions a turn.
Sandstorm can Blind. Death Claw takes 99% of current HP and paralyseswiki, so wear Jeweled Rings for the Paralysis and heal straight after.
Rain's Fire, Fina's Luminant Cannon and Sakura's Luminant Glim cover it on their own. Clive, Squall or Vaan add physical Fire, and Cecil adds Light, to Lasswell, Lid or Jake. Terra gives Nichol Fire magicVorxu. Bench Lid's Earth.
Reward: 17,000 EXP, 9,500 gil and a Mist Turbo Ether.
🎒 Nothing to steal · Drop: Mist Turbo Ether - Ley line 3Mt. Thunderclap, then Ayaka in Sian
Mt. Reizan, Ignis, Lake Ryusei and Alluvion
Where you are: objective “Go to Mt. Reizan”
Mt. Reizan: danger 46, 2 saves, 2 Tablet ShardswikiVorxu.
Until your objective says "Go to the Crystal Tower", a tornado keeps the airship away from the Wandering Lands, so you have to walk there through this mountainwiki.
Enemies here: Mt. Reizan (danger 46)
Tap a name for its attacks, resistances and full loot.
 Wild Maneuverer BossEnemy Lv 46 · 18,700 HP · Weak: WaterSteal: nothing
 Ignis BossEnemy Lv 47 · 205,000 HP · Weak: WaterSteal: nothing
- AdarEnemy Lv 46 · 4,500 HP · Weak: WaterSteal: nothing
 EmberEnemy Lv 46 · 19,100 HP · Weak: Ice, WaterSteal: nothing
- Sliding WormEnemy Lv 46 · 18,700 HP · Weak: Ice, WaterSteal: nothing
 NozuchiEnemy Lv 47 · 54,000 HP · Weak: WindSteal: Knife of Poison; rare: Elixir
Enemies here: Lake Ryusei
Tap a name for its attacks, resistances and full loot.
 Alluvion BossEnemy Lv 48 · 210,000 HP · Weak: LightningSteal: nothing
 Prism CoreEnemy Lv 46 · 13,000 HP · Weak: LightningSteal: nothing
- Shard 1 and X-Ether x2
After the first bridge, turn left. The Tablet Shard is on the way down, and the ladder takes you to X-Ether x2Vorxu.
- Magicite Cryst past the second bridge
- Shard 2 and the Resonance Stone
Back at the end of the second bridge, go south. Across the first southern bridge, shard 2 is on the right. Past the next bridge, a chest holds the Resonance Stone (Mysidia Radar part #2)Vorxu. You'll show it to Lid on the airship later (Before the Crystal Tower, step 4).
- Analysis Hammer (wiki only; spot is a gap)
The wiki's map lists an Analysis Hammer for Lidwiki. It does 25% more damage on an elemental weakness once the target's been scanned with Libra, which Nichol has.
Gap · where it isVorxu's route doesn't include it, and no source describes its spot in words. - Last saveset up for Ignis
Heal and save at the save point at the endVorxu. Ignis goes first. Take off the Solar Pendant, because it turns physical attacks into Fire, which Ignis halveswiki. Wild Maneuverers (weak to Water) are a common fight on the waywiki.
 Boss · Ignis
Weak to Water, halves Fire. He has First Strike and opens with Rage, so Blistering Hellfire shows up within his first few actions. Walk in with full HP and Shell upwiki. The Fire Sprite Earrings from Sian halve most of what he throws at youwiki.
Every hit builds his fury, and right now each hit counts double. At "Ignis's fury has reached its apex!" he rages with Blistering Hellfire and Carmine Inferno, and a stagger ends itwikiVorxu.
Nichol's Aquatic Pulse, Waterga and Aqua Blast carry this fightwiki. Charlotte's Water Surge, or Wilhelm, Camille, Cloud or Tidus, give Rain, Lasswell, Lid or Jake physical Water. Terra, Squall or Shantotto give Sakura or Dark Fina Water magicVorxu. Bench Rain's Fire. His other moves are Inferno Sphere, Firaga, Colossus Cleave, Charge and Scorch.
Reward: 35,000 EXP, 14,000 gil and a Flame Scroll II.
🎒 Nothing to steal · Drop: Flame Scroll II- Boss · Alluvion
Weak to Lightning, immune to Water. She's at Lake Ryusei, which you reach from the top of Mt. Reizan or from the world mapwiki. She goes first and forms three Prism Cores (13,000 HP each) at a time. Her loop is cores, then Waterga or Cyclone Wave, then Psycho Skewer, then she absorbs the cores for Graceful Delugewiki.
Kill the cores before "Prism cores absorbed!" or Graceful Deluge hits way harderVorxu. Sakura's Tonitus hits every enemy with Lightning, so one cast tags her and every corewiki. Add Thundaga, Sage's Eye and Jake's Blitzstrahl. Lightning, Bartz or Cloud give Rain, Lasswell or Lid physical LightningVorxu. Use Fina's Shellga for the Water magic, and leave Water out.
Sources disagree · her spellsVorxu lists Thundaga and Graviga among her attacksVorxu. The wiki guide says they're on her sheet but she never actually casts themwiki.Reward: 40,000 EXP, 14,000 gil and a Water Scroll II.
🎒 Nothing to steal · Drop: Water Scroll II - Lake Ryusei shard, then east to the Forest Path
Right after the fight, the Tablet Shard is on the left. Leave the lake and keep going east into the Forest PathVorxu. Objective: Go to the Wandering Lands.
Forest Path, Tellus, Wandering Lands and Umbra
Where you are: objective “Go to the Wandering Lands”
Enemies here: Forest Path (danger 48)
Tap a name for its attacks, resistances and full loot.
 Crunchu BossEnemy Lv 49 · 56,700 HP · Weak: FireSteal: nothing
 Tellus BossEnemy Lv 49 · 220,000 HP · Weak: WindSteal: nothing
- Greater MantisEnemy Lv 47 · 19,500 HP · Weak: Fire, WindSteal: nothing
 NanochuEnemy Lv 47 · 4,800 HP · Weak: Wind, DarkSteal: nothing
 Corpse flowerEnemy Lv 48 · 19,500 HP · Weak: Fire, WindSteal: nothing
 PhorusrhacosEnemy Lv 48 · 19,500 HP · Weak: WindSteal: Hi-Potion; rare: Rune Arch
 Quick RoperEnemy Lv 48 · 19,500 HP · Weak: FireSteal: Thorn Whip; rare: Remedy
Enemies here: Wandering Lands (danger 50)
Tap a name for its attacks, resistances and full loot.
- Tellus BossEnemy Lv 49 · 220,000 HP · Weak: WindSteal: nothing
 Umbra BossEnemy Lv 50 · 260,000 HP · Weak: LightSteal: nothing
 Dark ElementalEnemy Lv 48 · 19,100 HP · Weak: LightSteal: nothing
 White ElementalEnemy Lv 48 · 19,100 HP · Weak: DarkSteal: nothing
 Dark WispEnemy Lv 49 · 19,900 HP · Weak: Ice, LightSteal: nothing
- HeimdallrEnemy Lv 49 · 4,800 HP · Weak: DarkSteal: nothing
- ShutEnemy Lv 49 · 19,800 HP · Weak: Water, LightSteal: Hi-Potion; rare: Illusory Robe
- AbyssalEnemy Lv 50 · 57,700 HP · Weak: Ice, LightSteal: Ice Scroll II
- Forest PathMegalixir
From the entrance, go east, then north to the chestVorxu.
- Shard 1 and the save before Tellus
Back at the entrance, go north. The Tablet Shard is round the corner. Follow the path to the save point and healVorxu.
- Boss · Tellus
Weak to Wind, halves Earth. Two actions a turn. His first action is Crushing Breath (devastating), so heal straight after. Then he makes a call every second turn, and the first one is always "Show me majestic magic!"wiki.
On a magic call, hit him with magic. On "Show me magnificent martial skill!", hit him physically. The wrong kind sets off his counterVorxu. His Magic is a lot higher now, so Fina's Shellga matters just as much as Rain's Protectgawiki.
Jake's Wind comes in both kinds (Gale Strike and the Aero line). Bartz, Clive or Onion Knight give Rain, Lasswell or Lid physical Wind, and Y'shtola gives Nichol, Sakura or Dark Fina Wind magicVorxu. Bench Lid's Earth.
Reward: 45,000 EXP, 17,000 gil and an Earth Scroll II.
🎒 Nothing to steal · Drop: Earth Scroll II - Back into the Forest PathChef's Knife x2 and shard 2
- Wandering LandsSilver Key
Walk through the first area. In the second one, go right at the first fork for the Silver Key, which halves Dark damageVorxuwiki.
- Shards 1 and 2
Take the left fork for shard 1 on the way. After the cutscene, shard 2 is to the northVorxu.
- Elixir and the last save
- Boss · Umbra
Weak to Light, halves Dark. Two actions a turn. Every hit that isn't Light charges him up ("Gathering dark energy…" all the way to "Dark energy overflows!"). A full charge fires Seal of Conviction (devastating Dark, 2 hits on the party), and so does the first time his HP drops under 65%wiki.
A stagger only delays it. If he's charged, it's his first action after the stagger. Light hits don't charge him but draw a Dark Edge counter on whoever hit him, and hits while he's staggered don't charge him either. Light's still the better dealwikiVorxu.
Fina's Luminant Cannon and Sakura's Luminant Glim do the breaking, and Fina's Holy adds damage. Get Rain's Protectga up and Silver Keys on the casters. Warrior of Light, Firion, Cecil or Noctis give Rain, Lasswell, Lid or Jake physical LightVorxu.
Below about two-thirds HP he adds MeteorVorxu. His other moves are Clobber, Graviga, Flare, Darkga, Flurry, Blindga and Poisonga.
Reward: 50,000 EXP, 21,000 gil and the Demon's Ring. It turns plain physical attacks into Dark, so hang on to it for Sol.
🎒 Nothing to steal · Drop: Demon’s Ring
Before the Crystal Tower: Bahamut, A New Leaf, cleanup and exit
Where you are: on the airship after Umbra, objective “Go to the Crystal Tower”
Enemies here: Optional stops
Bahamut is fought from the airship. A New Leaf's stops (Grandshelt, Mitra, Waterfall Way) are earlier areas with tables in their chapters. Dragon's Maw has its own section under Postgame. The three Pharm cave masters' tables are below. Tap a name for its attacks, resistances and full loot.
Enemies here: Tartarosaurus Cave (danger 50)
Tap a name for its attacks, resistances and full loot.
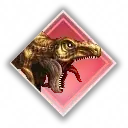 Tartarosaurus BossEnemy Lv 50 · 350,000 HP · Weak: IceSteal: nothing
Enemies here: Titanoraidos Cave (danger 60)
Tap a name for its attacks, resistances and full loot.
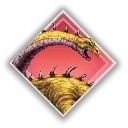 Titanoraidos BossEnemy Lv 60 · 800,000 HP · Weak: IceSteal: nothing
Enemies here: Malboro Menace Cave (danger 60)
Tap a name for its attacks, resistances and full loot.
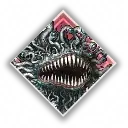 Malboro Menace BossEnemy Lv 60 · 700,000 HP · Weak: FireSteal: nothing
 Boss · Bahamut
No weakness. Two actions a turn. From Chapter 7 on, once you've got Carbuncle, Ramuh, Leviathan, Ifrit, Shiva, Titan and Odin, Fina hears a voice when you board the airship. Tell her you're readywiki. Save first.
Once he's under 80% HP, if you hit him with the same element three times, he fires that element back at your whole party. Non-elemental hits never count, so mix up your elements or hit without one.
He counts down from 4 to 1 to Megaflare. A stagger cancels it and resets the count, so save your breaks for the countdown. Death Claw, Crushing Grasp and Stranglehold paralyse, so wear Jeweled Rings. Sundering and Debilitating Winds strip your buffs, so recast Protectga and Shellgawiki. With no weakness, Visions don't add anything elemental here.
Reward: the esper Bahamut, 50,000 EXP, 18,750 gil and a Magicite Cryst.
🎒 Nothing to steal · Drop: Magicite Cryst- A New Leaf → Knight's Medallion and Rain's stats (CONFLICT on when it opens)
Talk to Raegen on the airship deck. Then it's the king of Grandshelt, then ask about Raegen in Mitra (RPG Site via kingy says it's an Old Woman)kingy, then find the flower at the end of Waterfall Way, then back to Raegen on the deck.
Reward: the Knight's Medallion, and Rain gets HP +100, MP +30, Stamina +30 and Strength +20wiki.
Sources disagree · when it opensThe wiki says with "Go to the Crystal Tower"wiki, and CGInferno did it with the HUD still on Chapter 7kingy. RPG Site says after Chapter 7RPG Site, Game Rant after the first tower visitGameRant, and PowerPyx lists it under Chapter 8PowerPyx.If Raegen isn't on the deck yet, land at the tower and come back out (step 7).
- Merchant shipsAncient Tome and a cheap Magicite Cryst
The third ship sells an Ancient Tome for 45,000 gil, once, from the start of the chapter. The fourth sells a Magicite Cryst for 50,000 gil, once, from "Go to the Wandering Lands". That's way better than the 250,000 it costs at the Colosseum shopwiki.
Gap · where the ships areNo source says where the ships sail. - Show Lid the Resonance Stoneradar treasures 6 to 9
On the airship, show Lid the Resonance Stone from Mt. ReizanVorxu. The wiki's collections page puts four treasures on this upgradewiki. Ancient Hammer (off Dirnado: head south from the Sanctum of Noctis). Magicite Cryst (Grandshelt: head east from the Lost Cave). High Caster (off Pharm: head west from the Titanoraidos Cave). Philosopher's Stone (off Zoldaad: head south from the Gogmagog Cave).
The last radar part, the High-Power Generator, is sold by the fifth merchant ship for 60,000 gil once you've found treasures 1 to 9wiki.
Sources disagree · the Ancient HammerOther sources tie the Ancient Hammer to the High-Power Generator instead. See the Gaps notes. - Pharm cave mastersTartarosaurus, Titanoraidos, Malboro Menace
You can run from all three, and each one pays a Magicite Crystwiki.
Tartarosaurus: Enemy Lv 50, 350,000 HP, weak to Ice, halves Earth, and Meteor is its big hit. 13,000 EXP, 13,000 gil, drops an Elixir. Titanoraidos: Enemy Lv 60, 800,000 HP, weak to Ice, halves Wind and Lightning, uses Ultima and Snort. 40,000 EXP, 25,000 gil, drops a Megalixir. Malboro Menace: Enemy Lv 60, 700,000 HP, weak to Fire, uses Putrid Breath. 40,000 EXP, 25,000 gil, drops a Megalixirwiki.
The wiki says to leave the two Lv 60 masters for last.
Gap · where the caves areNo source says where the caves are on Pharm.Order and strategy are in Postgame → Free roam, missing collectibles and gear roadmap → Cave Masters.
- Dragon's MawIntangir and the Rogue Magitek Weapon
Both of these are optional and listed for this chapterwiki. Intangir: Enemy Lv 52, 300,000 HP, weak to Earth, Light and Dark, and absorbs the other five elements. The Rogue Magitek Weapon: Enemy Lv 63, 573,000 HPwiki.
The route, chests and strategy are in Postgame → Dragon's Maw: all 7 chests, bosses and secret island.
- Where the YES/NO comesafter Behemoth, before Sol (resolved)
You can board the airship and leave from inside the Crystal TowerVorxu, so landing doesn't lock you out of anything.
The one real point of no return is the glowing pad next to the Faerie Bow and Magicite Cryst chests at the end of the invisible-path floor, after Behemoth and before Sol. It says: "There is no going back from here. Make sure you are fully prepared if you intend to press on. Do you still wish to proceed?" That's from the wiki's Chapter 8 and Points of No Return pages, Vorxu's Beyond Hope, and kingy's Magicite Cryst page (from Gamer Guru's video)wikiVorxukingy.
Yes takes you on to Sol and the last fights. No lets you leave, and from then on the tower lets you back in at its middle and top floorswiki.
Sources disagree · the prompt and Solkingy's Chapter 8 page, based on CGInferno's video, has Sol before the last save and the promptkingy. Every other source, including kingy's own Magicite Cryst page, puts the prompt first. Details are in Chapter 8, Invisible path, step 10. - Chapter exitfly to the Crystal Tower
Fly to the Crystal Tower. kingy shows the "Chapter 7 Reckoning COMPLETE" card after Umbra's sceneskingy, but the HUD stays on Chapter 7 until you're inside the tower, where it flips to Chapter 8 with "Go to the top of the tower". Vorxu says landing ends the chapterVorxu.
The wiki files the tower's 11 chests under this chapter's last objectivewiki. I keep them in Chapter 8, floors 1 to 3 and the invisible path.